Windows系统安装与配置PyTorch深度学习开发环境
Windows系统安装与配置PyTorch深度学习开发环境。
下载并安装 Cuda
下载CUDA:https://developer.nvidia.com/cuda-downloads (2.8GB)
安装CUDA:
- 安装CUDA驱动
- 安装CUDA开发环境
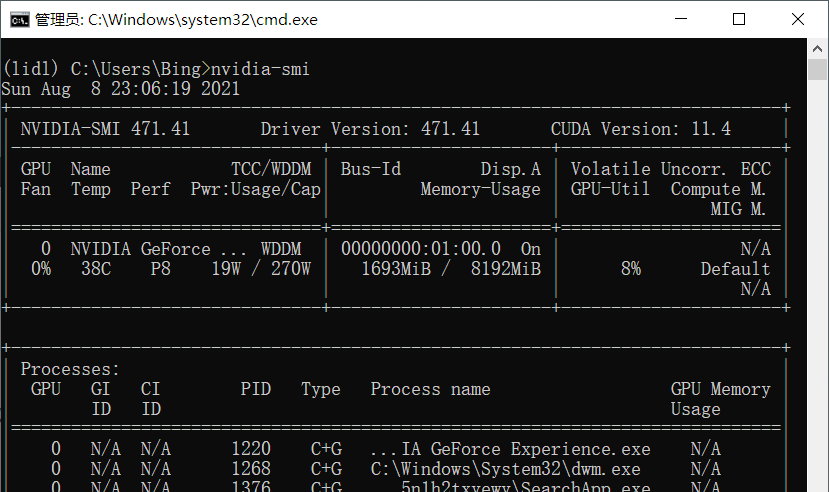
安装完成后,在命令行界面使用 nvidia-smi 检查安装情况。
下载并安装 Anaconda
下载Anaconda:https://www.anaconda.com/products/individual#Downloads
或者miniconda:https://docs.conda.io/en/latest/miniconda.html
安装Anaconda:
- 按照默认选项安装,可以自定义安装路径
安装完成后,在Anaconda Powershell Prompt (base) 环境中,运行python --version,检查安装情况。
- 创建深度学习使用的环境:
conda create -n lidl python=3.8 - 激活创建的深度学习使用环境:
activate your_env_name
使用文末参考链接,设置conda与pip源的更换。
更换conda源(Tsinghua)
conda config --add channels https://mirrors.tuna.tsinghua.edu.cn/anaconda/pkgs/free/
conda config --add channels https://mirrors.tuna.tsinghua.edu.cn/anaconda/cloud/conda-forge
conda config --add channels https://mirrors.tuna.tsinghua.edu.cn/anaconda/cloud/msys2/

conda config --set show_channel_urls yes
更换pip源
# 阿里源
pip config set global.index-url https://mirrors.aliyun.com/pypi/simple/
# 清华源
pip config set global.index-url https://pypi.tuna.tsinghua.edu.cn/simple
# 腾讯源
pip config set global.index-url http://mirrors.cloud.tencent.com/pypi/simple
# 豆瓣源
pip config set global.index-url http://pypi.douban.com/simple/
下载并安装 PyTorch

获取下载代码:https://pytorch.org/get-started/locally/
(eg: pip3 install torch==1.9.0+cu111 torchvision==0.10.0+cu111 torchaudio===0.9.0 -f https://download.pytorch.org/whl/torch_stable.html )
在我们创建的lidl深度学习开发环境中:运行安装PyTorch的代码
验证安装:https://pytorch.org/get-started/locally/#windows-verification
Python环境中,运行下面示例代码:
import torch
x = torch.rand(5, 3)
print(x)
import torch
torch.cuda.is_available()运行《动手学深度学习课程》示例代码
下载d2l课程文件包:https://zh-v2.d2l.ai/ (courses)
安装d2l所需要的包:pip install jupyter d2l
启动jupyter notebook,运行notebooks/chapter_convolutional-modern/resnet.ipynb
参考:
- 李沐:Windows 下安装 CUDA 和 Pytorch 跑深度学习 - 动手学深度学习v2 (bilibili)
- Anaconda-用conda创建python虚拟环境 (zhihu)
- 使用conda创建一个环境,更换conda源与pip源 (ml.akasaki.space)
- 工具箱的深度学习记事簿 (ml.akasaki.space) (github)
- 2021年最全最实用的深度学习虚拟环境使用攻略——Anaconda从入门到起飞 (zhihu)
- python3.8
check_hostname requires server_hostname(CSDN) - Jupyter Notebook 内核无法启动 (# import win32api;ImportError: DLL load failed: 找不到指定的程序) (把pywin32版本降级到228,就解决了) (CSDN1) (CSDN2)
从零开始教你在Windows上安装PyTorch,支持GPU计算,验证测试 (bilibili)
- Win 11 + RTX3060 的深度学习环境配置 (zhihu)
本作品采用 知识共享署名-相同方式共享 4.0 国际许可协议 进行许可。
评论已关闭